Use IA para gerenciar a coordenação de reuniões por você
Agendamento não é apenas escolher um horário. É a coordenação que o cerca. Os e-mails, os reagendamentos, as atribuições, os acompanhamentos — trabalho que pode, silenciosamente, tomar mais tempo do que as próprias reuniões.
Com o agendamento e a automação com tecnologia de IA do Calendly, você pode delegar esse trabalho de coordenação, mantendo o controle. Este guia mostra como configurar um sistema no qual, em vez de gerenciar cada solicitação, você define suas regras e deixa o Calendly cuidar do resto.
Como isso funciona (e o que você vai configurar com este guia)
Pense nisso como adicionar camadas de coordenação sobre sua base de agendamento:
- Callie lida com as conversas de agendamento que acontecem no e-mail
- Formulários de encaminhamento garantem que as reuniões sejam direcionadas para a pessoa ou o caminho certos
- Automações cuidam de tudo antes e depois da reunião
Juntas, elas criam um sistema em que as reuniões são agendadas, comunicadas e acompanhadas automaticamente, com intervenção mínima da sua parte.
Funcionalidades do Calendly que você vai usar
Etapa 1: Configure uma base de agendamento clara
Callie e Automações só funcionam tão bem quanto os Tipos de evento por trás delas. Quanto mais claras forem suas regras, melhor o sistema funciona.
Acesse Agendamento → Tipos de evento e revise seu Tipo de evento padrão. Confirme se o básico está bem ajustado:
- Duração
- Local
- Janelas de disponibilidade
- Tempos de reserva e limites
Se você ainda não configurou sua base, nosso guia de agendamento de reuniões explica tudo do início ao fim.
Etapa 2: Ative a Callie
Antes de a Callie poder conduzir conversas de agendamento por você, você precisa ativá-la na sua Conta e fornecer o básico de que ela precisa para funcionar.
Vá para Configurações → Funcionalidades → Callie. A partir daí:
- Ative a Callie para sua Conta
- Confirme suas preferências de agendamento (qual Tipo de evento a Callie deve usar como padrão, seu fuso horário, quaisquer restrições que você queira estabelecer)
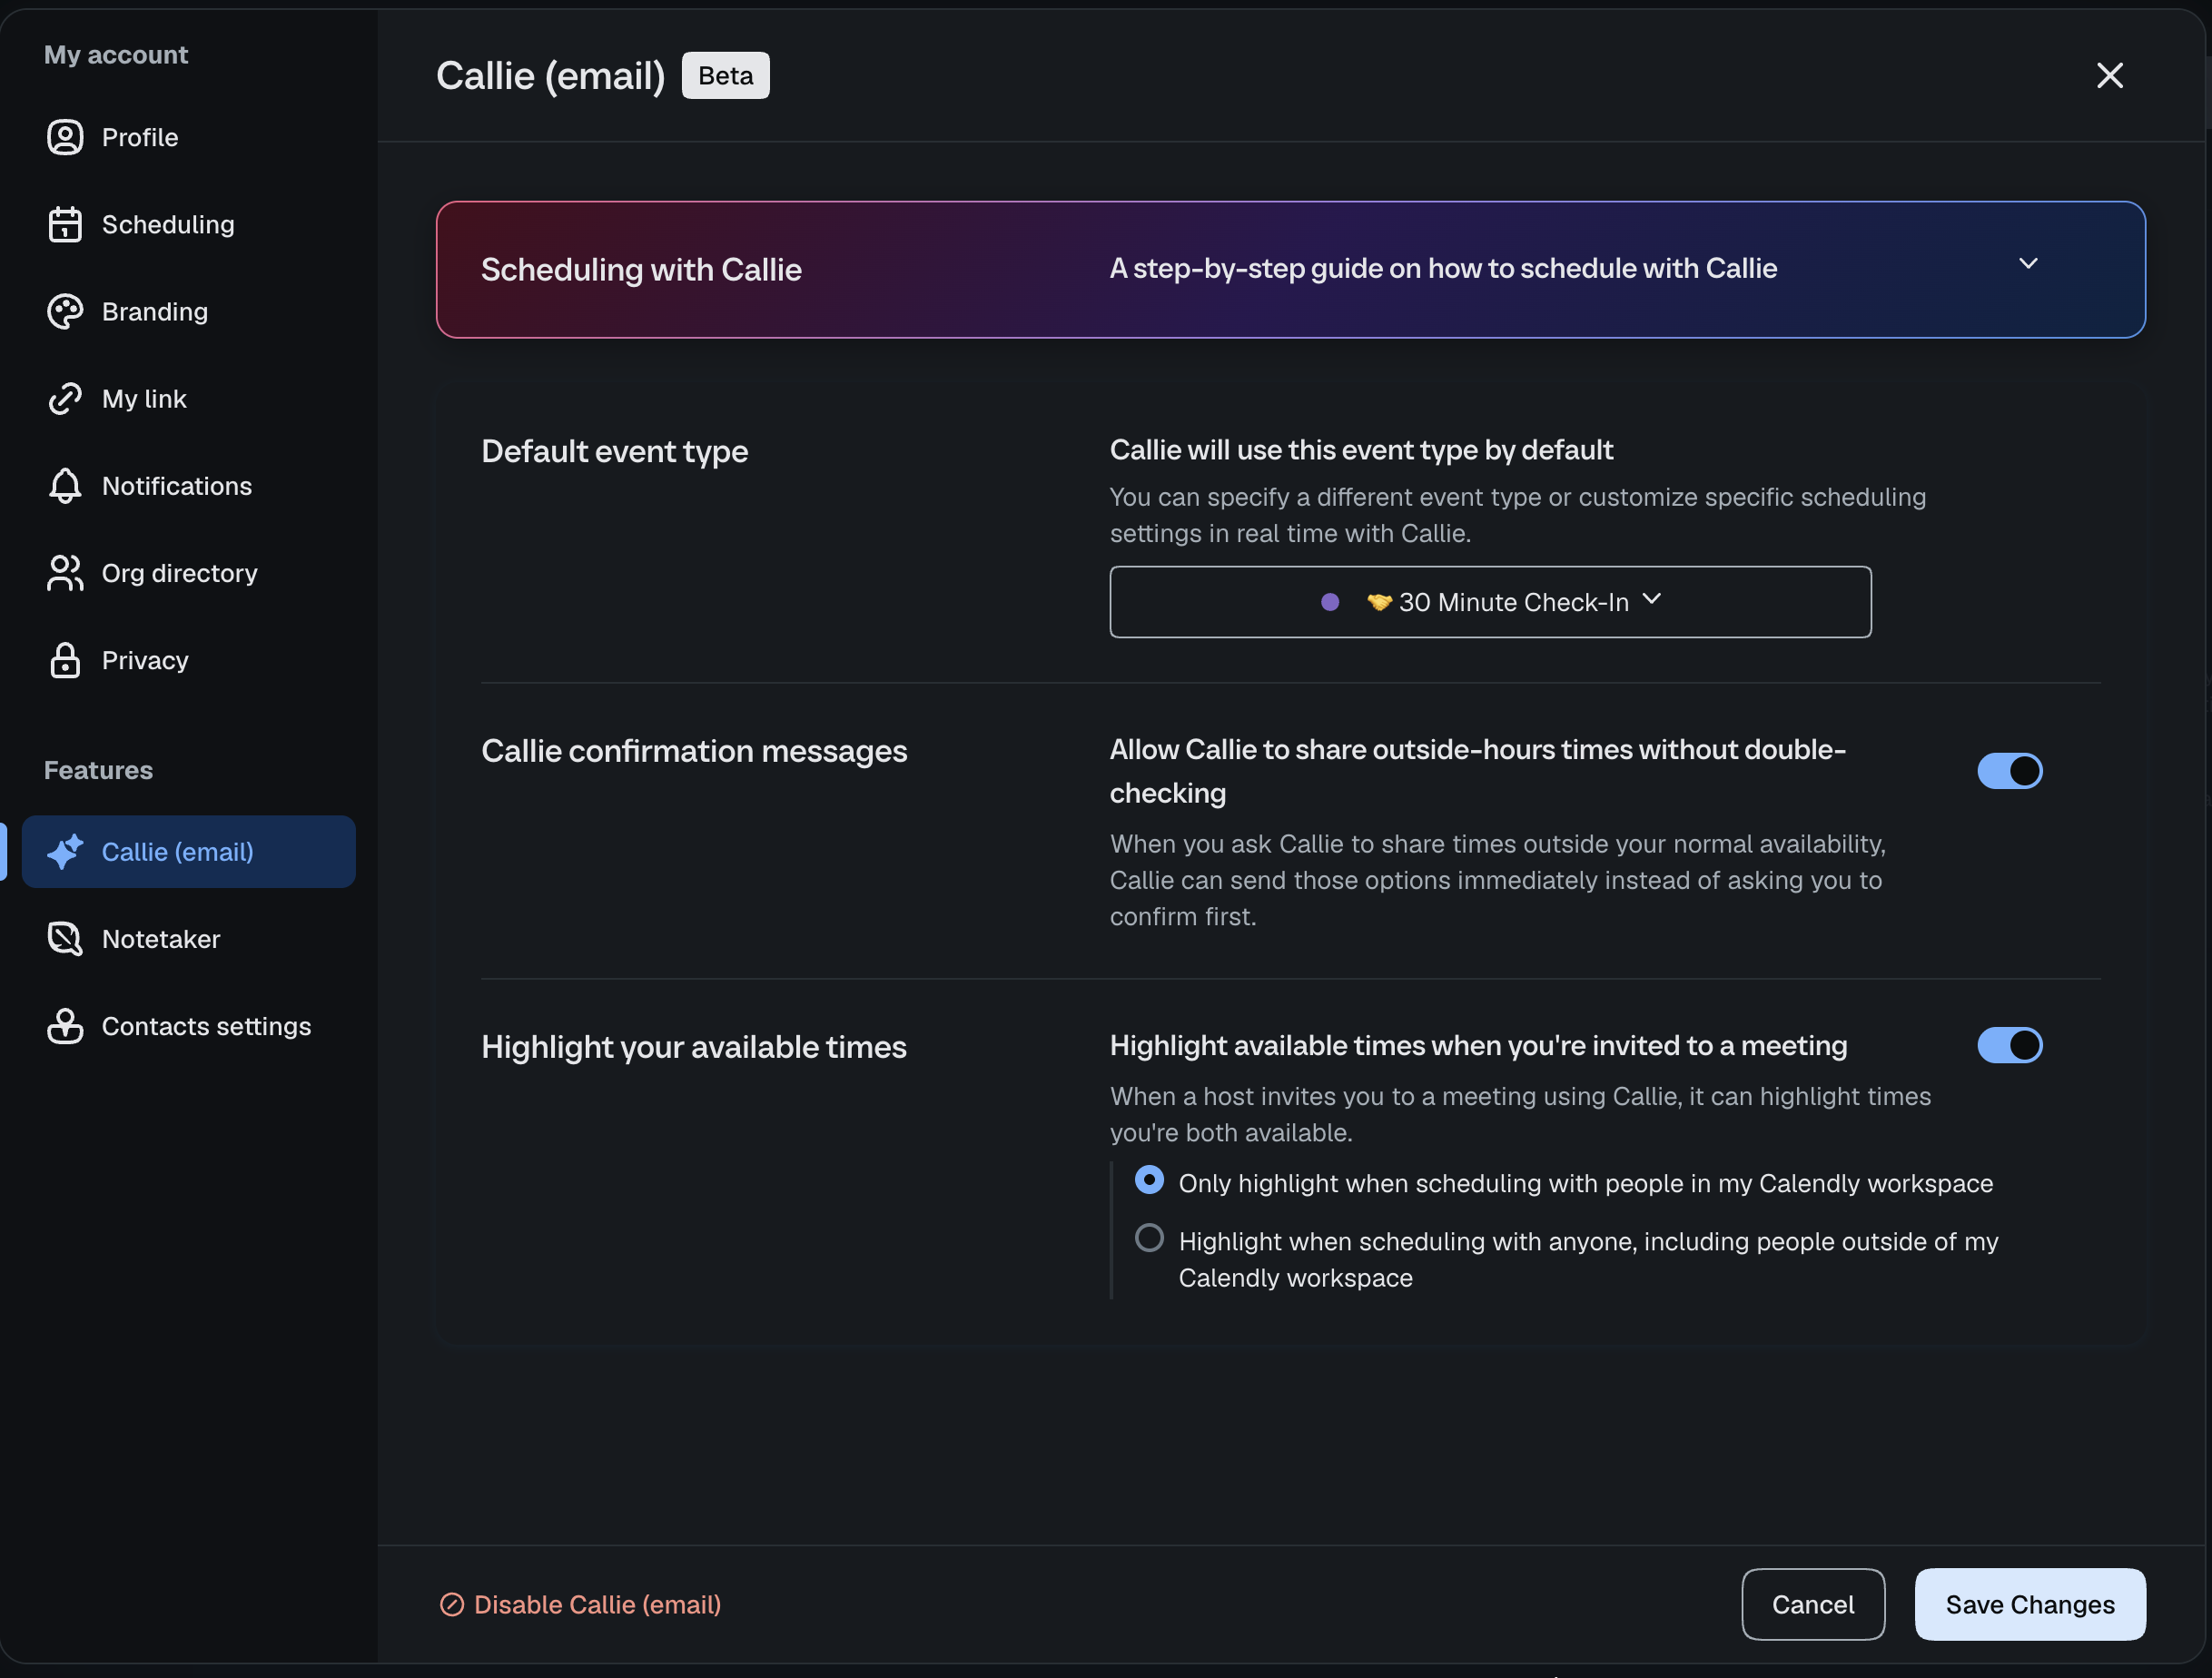
Quando a Callie estiver ativada, você pode incluí-la em qualquer conversa por e-mail adicionando callie@calendly.mom no campo CC.
Etapa 3: Use a Callie para lidar com conversas de agendamento
Reduza o vai-e-volta no e-mail quando um link de agendamento não for exatamente a ferramenta certa. Use links para volume. Use a Callie para nuance.
A Callie funciona melhor quando:
- Você está no meio de uma conversa por e-mail ou no aplicativo do Calendly e não quer quebrar o fluxo
- Uma reunião precisa ser reagendada
- Você está agendando com um VIP ou abrindo uma exceção
- Um link pareceria transacional demais
- Você quer se desviar dos padrões do seu Tipo de evento
Como usar a Callie:
- Adicione a Callie a uma conversa por e-mail (callie@calendly.mom) ou use o botão
Perguntar à Callieno Calendly - Diga que tipo de reunião você quer agendar
- Deixe que ela proponha horários e gerencie as respostas
- Revise e aprove antes que alterações sejam feitas na sua agenda
Alguns comportamentos que vale a pena conhecer:
- Funciona diretamente no e-mail ou no Calendly — sem trocar de ferramenta
- Usa sua disponibilidade e regras existentes
- Conduz a negociação e o acompanhamento em seu nome
- Sempre pede sua aprovação antes de fazer alterações no seu horário ou nos detalhes da reunião
Etapa 4: Direcione solicitações de reunião recebidas para o lugar certo
Garanta que a reunião certa aconteça. O Encaminhamento elimina a necessidade de decidir manualmente “quem deve atender isso?” ou “o que deve acontecer a seguir?”
Para a maioria dos usuários individuais e equipes pequenas, um formulário de admissão simples é o ponto de partida certo:
- Adicione um Formulário de encaminhamento com algumas perguntas de admissão (por exemplo, sobre o que é a reunião, a função da pessoa, o objetivo dela)
- Defina regras de encaminhamento que enviem cada resposta para o Tipo de evento correto
- Compartilhe o link do formulário no lugar de um link de agendamento genérico
Você encontrará os Formulários de encaminhamento em Agendamento → Formulários de encaminhamento.
Etapa 5: Automatize a comunicação com Automações
Elimine lembretes, confirmações e acompanhamentos manuais. As Automações garantem que nada passe despercebido, mesmo quando você estiver ocupado.
Coisas comuns para automatizar em torno de cada reunião:
- E-mails de confirmação
- Mensagens de lembrete (e-mail ou SMS)
- Acompanhamentos pós-reunião
- Ofertas de reagendamento para não comparecimento
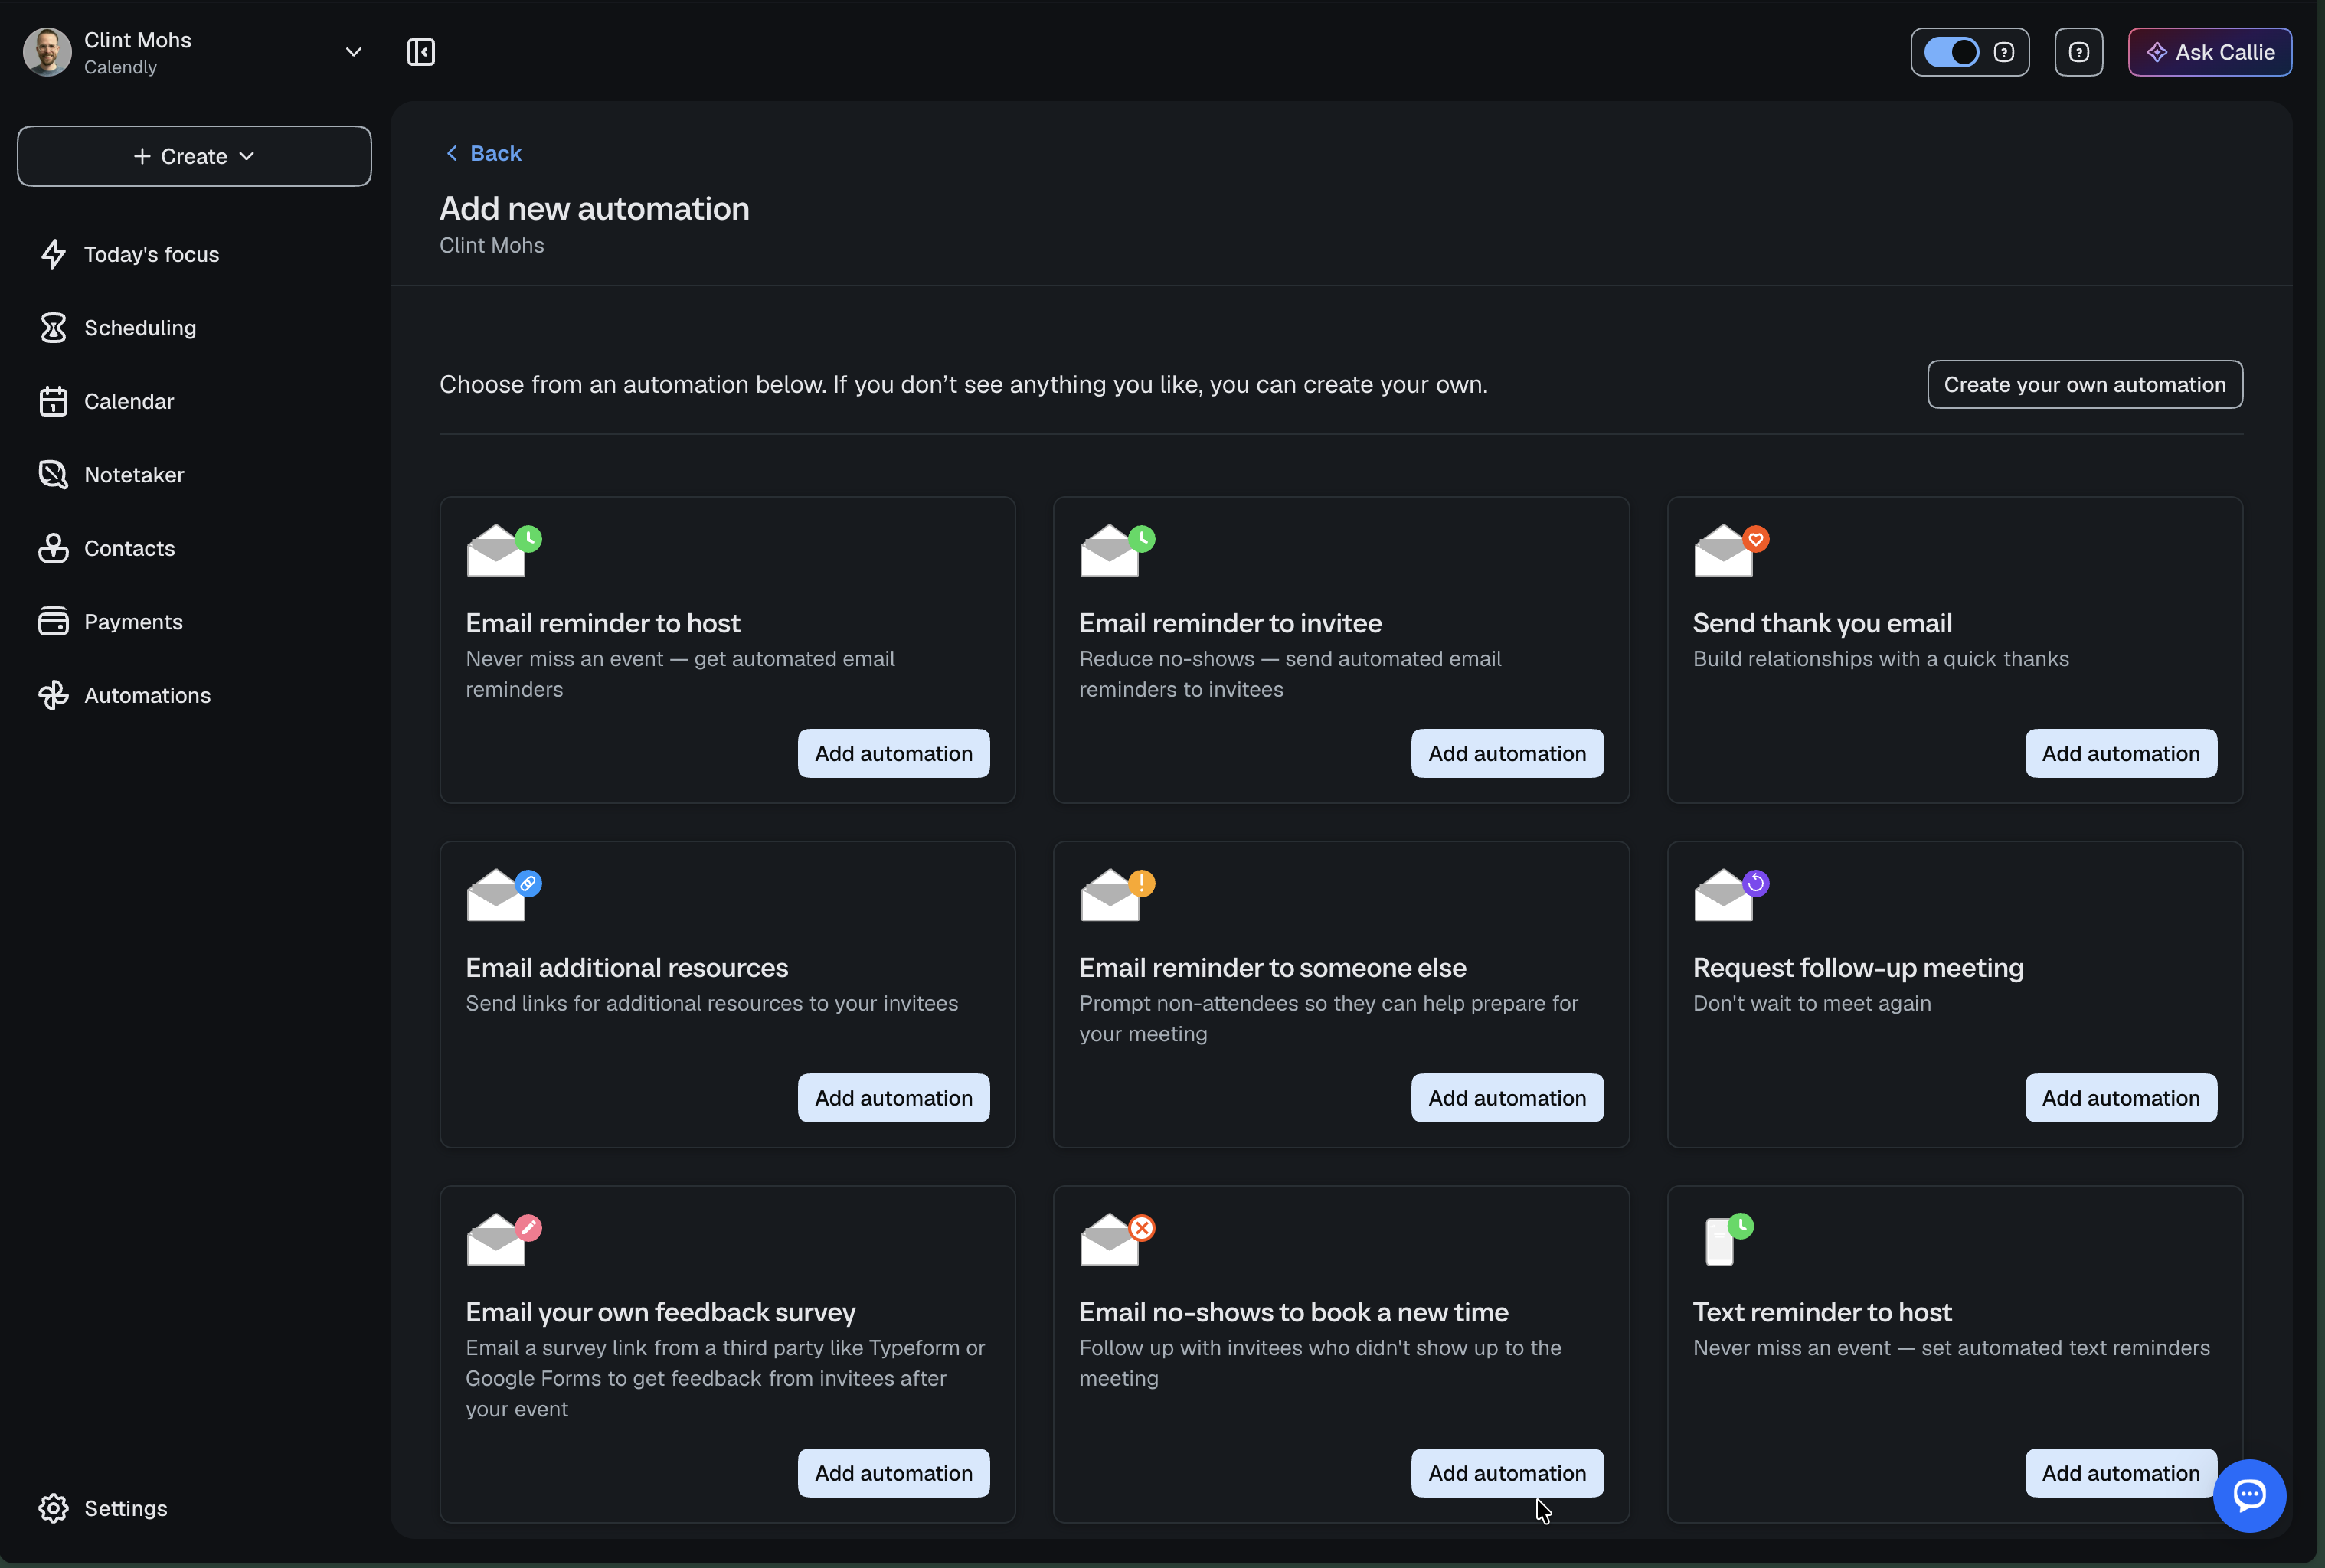
- Use um modelo ou crie o seu do zero
- Atribua cada Automação ao(s) Tipo(s) de evento correto(s)
- Personalize o tempo e o conteúdo das mensagens para corresponder ao objetivo da reunião
Para um passo a passo mais detalhado, veja o guia de Automações.
Etapa 6: Teste seu sistema de coordenação de ponta a ponta
Certifique-se de que as peças funcionem juntas antes de depender delas.
Percorra cada caminho de agendamento:
- Agende uma reunião pelo seu link de agendamento
- Agende uma reunião com a Callie no e-mail
- Envie seu Formulário de encaminhamento como um convidado faria
- Confirme se as Automações disparam nos horários certos
Verifique se:
- A disponibilidade e a atribuição estão corretas
- As mensagens são enviadas nos momentos esperados
- Toda a experiência parece fluida do lado do convidado
Etapa 7: Use seu sistema em conversas reais
O objetivo não é parar de agendar — é parar de gerenciar o agendamento. Quando seu sistema estiver em vigor, apoie-se nele.
Onde aplicá-lo:
- Conversas por e-mail → inclua a Callie
- Leads ou solicitações de entrada → compartilhe o link do seu formulário de encaminhamento
- Toda reunião agendada → deixe as Automações rodarem em segundo plano
Algumas frases curtas que ajudam:
- "Incluindo a Callie para encontrar um horário que funcione para nós dois."
- Compartilhe um link de reserva com encaminhamento em vez de um link genérico
- Deixe lembretes e acompanhamentos rodarem sem precisar checar
O que vem a seguir?
- Guia: Transforme cada reunião em próximos passos claros (Notetaker + Automações)
- Guia: Venda seu tempo com Meeting packages e sessões em pacote